Are you new to WordPress? Are you looking for a very good and appropriate theme for your newly built blog? As being a beginner newbie blogger, you must be a bit confused between choosing an appropriate theme either Free or Paid for your Blog. There are tons of Free/paid Themes available for the WordPress (Genesis,Whimag etc.) as you just getting started for the first time, you may need to do some research as well as try out few themes on your own to experience.
Installing a theme in WordPress is very easy for the first time users as well as for little experienced ones too. Although if you are updating to a new theme i.e. not for the first time, then you may need to look after few things before moving on further like putting on your WordPress in Maintenance Mode so that you don’t loose any traffic. Alright so there might be even more ways than the below mentioned two of them as these are the easiest methods I believe.
Methods to Install Themes on WordPress
As mentioned there might be other method too to install the themes, two of them are:
- Install the Theme using WordPress Admin Dashboard Theme Search
- Install a Theme using WordPress Admin Theme Upload method
Install the Theme using WordPress Admin Dashboard Theme Search:
This method is basically based on the WordPress Admin dashboard and the WordPress Theme marketplace only, so as this can result a safe way to install WordPress Themes.
SO basically if you are thinking to install a Free Theme from the WordPress Theme Market, then no need to go to the site manually and download it and again upload to install, this can be done more easily.
Alright, First things first! You need to login to your WordPress Admin Panel with your credentials.
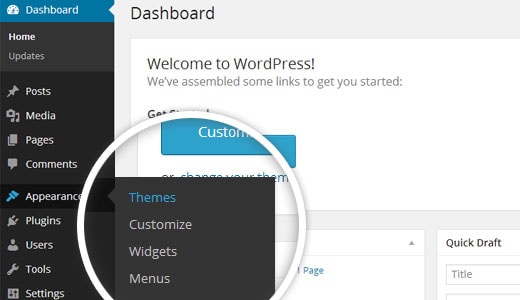
Now in the Dashboard, click on Appearance > Themes.

Now once you on the Themes Page. Click on the Add New button at the top most area.

One the screen where you will be able to see many options like Featured Themes, Popular Themes and Latest Uploads.
But The best way to choose a Theme for the first time is to use the Feature Filter option to filter certain things which might help you to get the best out of tons of others.
PS: For Tech Bloggers, Whimag is suggested as a good Magazine theme for News/Technology. Alright so give it a search after filtering the things out.
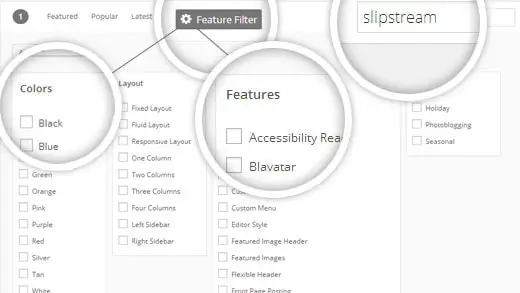
Based on your search, you will see a single theme or a list of themes that met your criteria. For the Tutorial Purpose, Here I searched for the theme named Slipstream .
So once when you find the most appropriate theme that you want to install, simply bring your mouse on top of the Preview image.
This will reveal certain options in front of screen like the install button, preview button, and details button.
Go ahead and click on the install button without thinking much. 😉
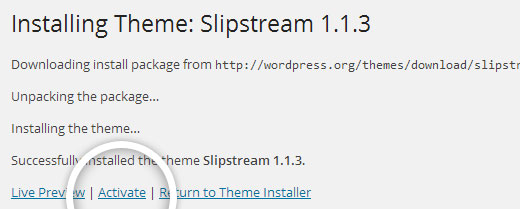
WordPress will now simply install your theme and will give you a success message with the link to activate or live preview for the theme.
Click on the activate button if you ready to charge your blog with a new Design, and you’ve successfully installed and activated your WordPress theme.
Note: Depending upon the theme, it may add different additional settings options that you may need to configure either through the built-in theme customizer or through a separate options panel in the main dashboard.
Usually themes like Whimag, Colorlib Themes gives you external separate options panel which is quite helpful and handy to customize easily. Moving on!
Install a Theme using WordPress Admin Theme Upload method
The first above method I covered in this tutorial is I guess the easiest method of installing any Free Theme in WordPress.
Now what if you have purchased some really good and nice structured Theme from Premium Market like ThemeForest or StudioPress?
Themes like Genesis or Thesis?
Or what if you want to install a self-made custom theme?
Then definitely the above method’s not going to work. So in that case, you would need to install the theme using the upload method from the WordPress admin panel.
So First Download the Theme Files (must be in .zip extension) that you purchased from any marketplace or by the Commercial Theme provider.
Now Login into your WordPress Admin Dashboard Panel then go to Appearance > Themes.
Once you are on the Themes page, click on Add New button to proceed.

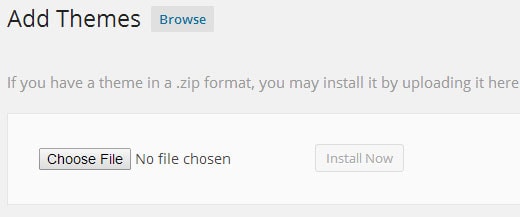
On the next screen, this time you have to click on the Upload Theme button at the Top to upload your downloaded theme .zip file.

You will be asked to click on the box to upload the theme from your Computer. Simply, Select the file and Click on Upload.
- Once your theme is installed, you will see a success message along with the link to activate and preview the theme.
Alright that’s it! 😀 Was it easy?
By the way, the above method is only for those who use Self-Hosted WordPress.org.
If you are using the WordPress.com to host your blog, you will not get the theme uploading option. In order to use a custom theme upload feature, you would need to use self-hosted WordPress.org.
Concluding It:
Alright so in the above two methods you learnt how to install any theme in WordPress Blog easily within few minutes easily.
There are many other methods to install a new theme on the Blog like using FTP (File Transfer Protocol) like FileZilla to upload a theme on the Host and then install it manually, but usually the above two methods are more than enough to overcome installing new themes. Some of the most suggested Themes are:
- Genesis by StudioPress
- Thesis
- Themes from ThemesLab
- WhiMag
- Hueman
Let me know in the comments down below which method you used to install which theme on your blog? Cheers!